I have been painting at our local history museum, the Booth, in Brighton, for many years now; stepping through its doors is a journey back in time and it’s a delight and an inspiration to spend quiet hours there painting from the collection of bugs and bones. My first attempts at butterflies looked rather flat, but then hit on the idea of adding texture and interest by painting initially through tissue. It’s a simple way of creating a printed effect and works well. This is a step by step I was asked to do by Artists and Illustrators Magazine and I’m reproducing it here for anyone who might be interested in giving it a go!
To start with, a fine array of paints, all good quality professional paints, very rich in pigment
This time I do start with a drawing onto the watercolour paper (Saunders Waterford) as the subject matter is so symmetrical and needs to look so. I lay a sheet of some scrunched-up then flattened absorbent tissue paper over this; chinese papers are good, some more absorbent than others, this one was a little thick so absorbed quite a lot of the pigment. The best is a piece of bark paper, very thin, so most of the paint applied transfers to the paper below which is what you want
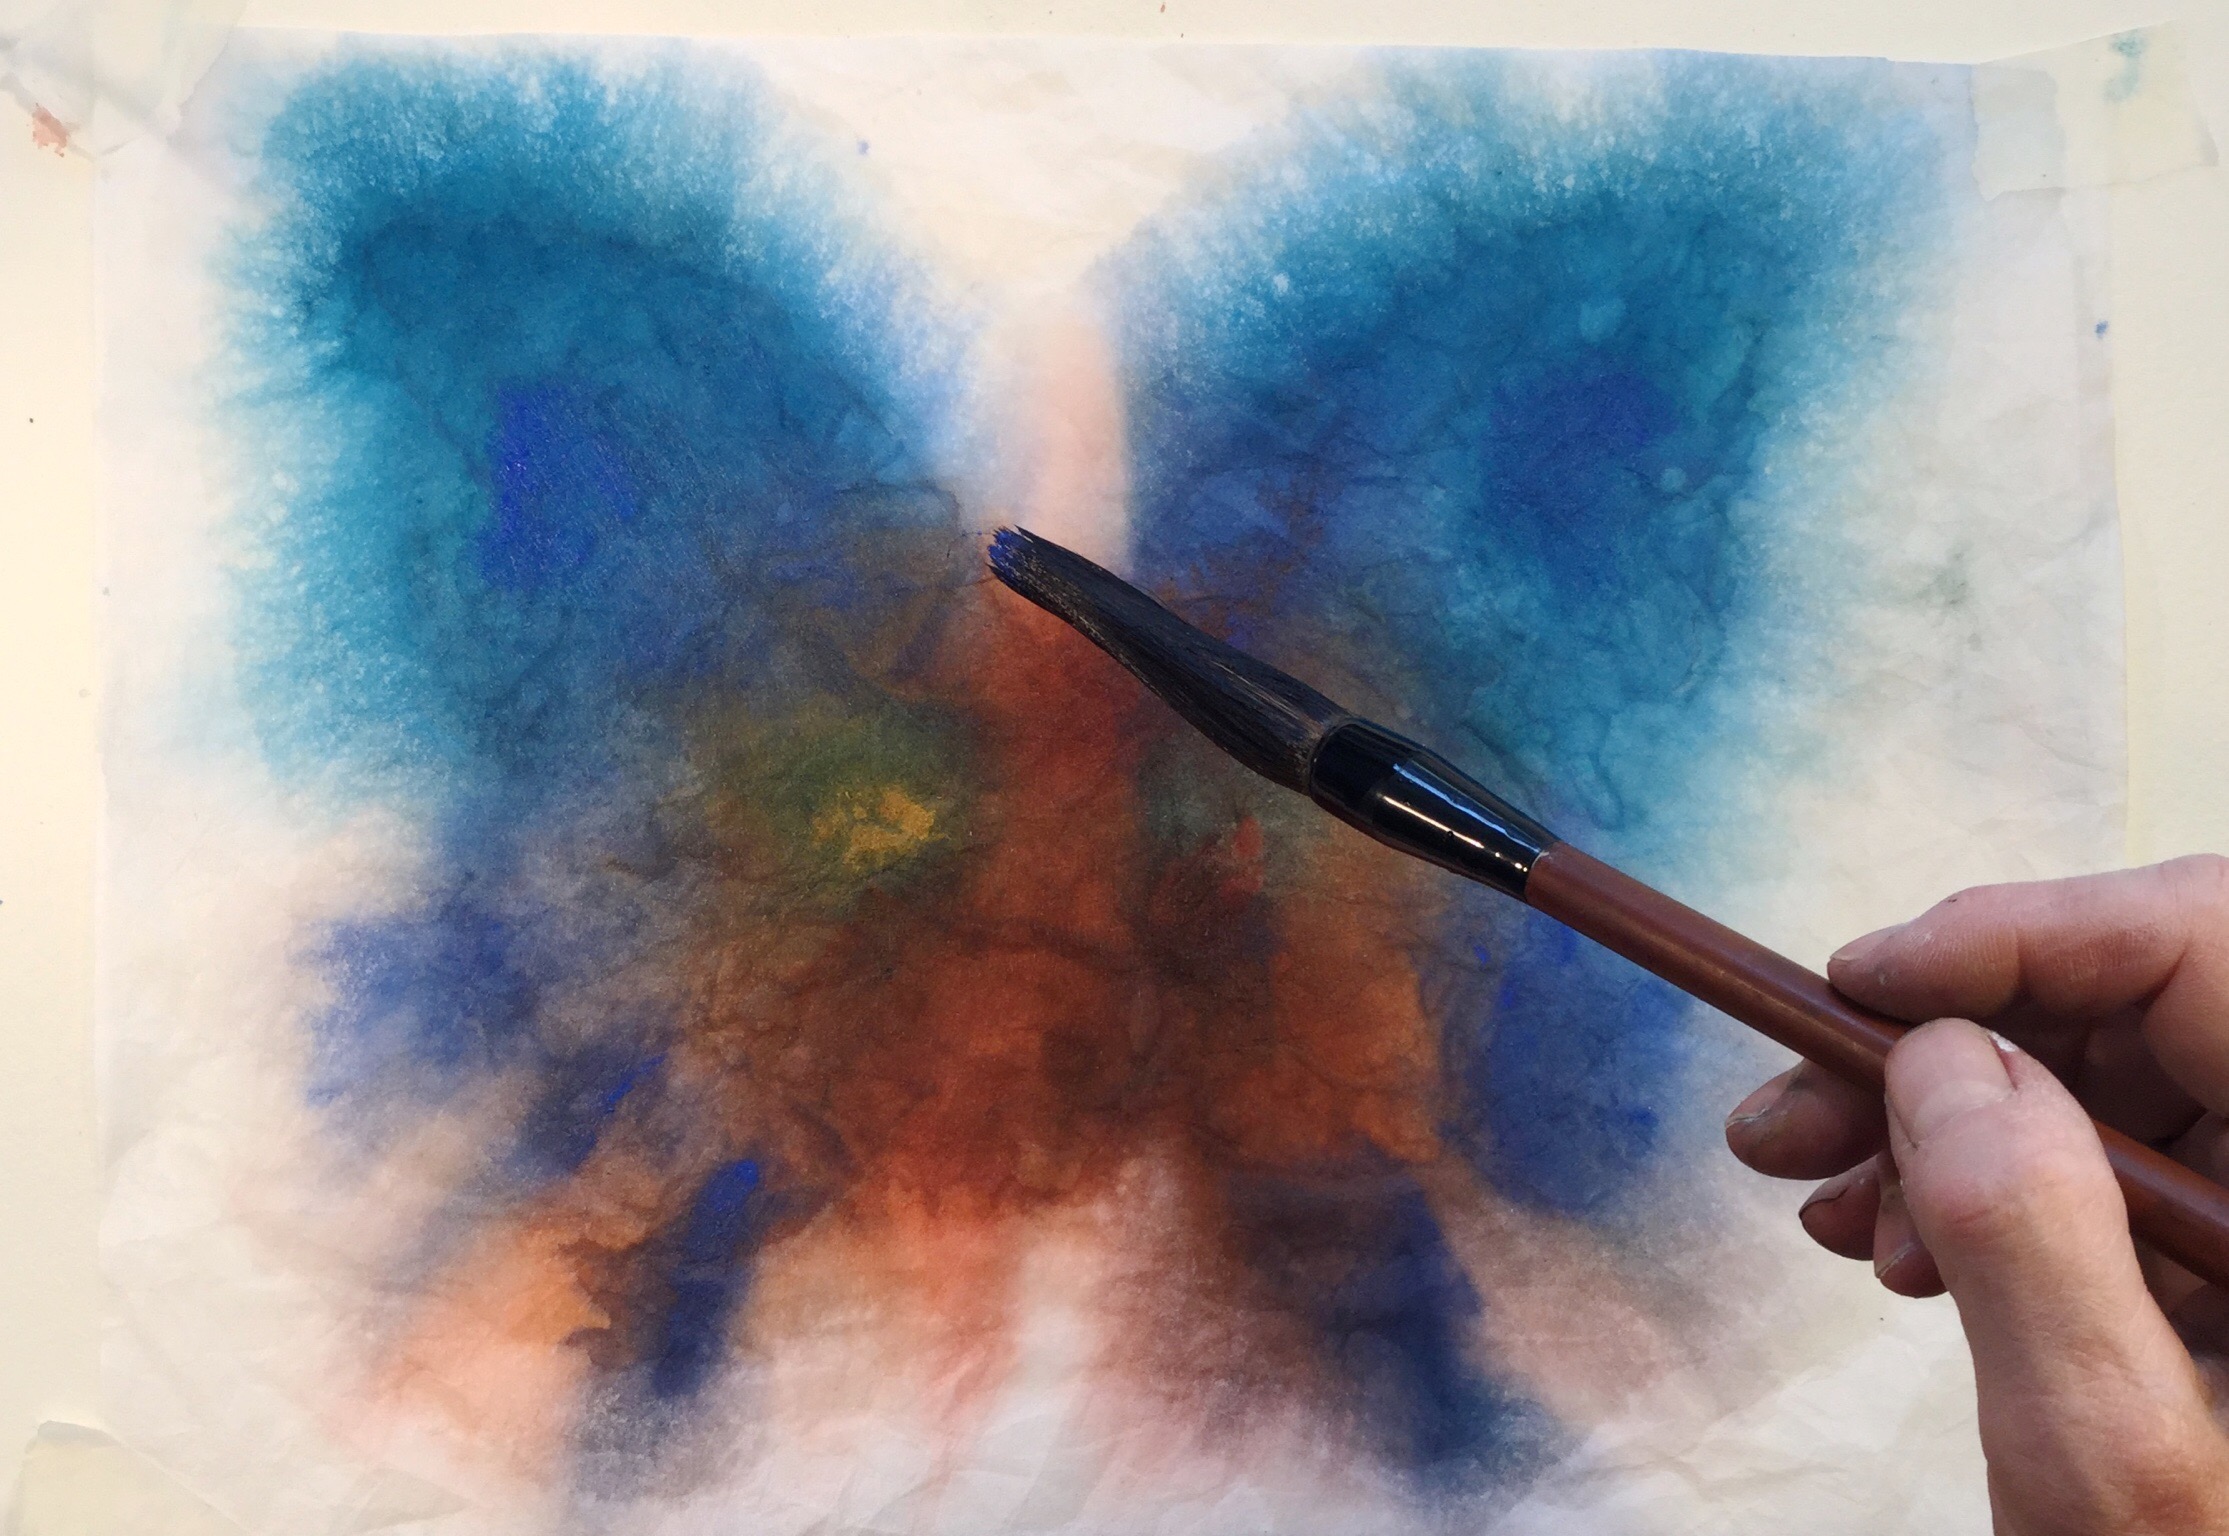
Spraying the tissue reveals the drawing below; magic, now you can put paint in the right places! I’m using a lovely big chinese brush with long hair, it holds a lot of water/paint and that’s what’s needed at this stage. I load the brush and saturate the paper, and once it’s saturated I drop more paint in, then drip clean water from a dropper bottle.
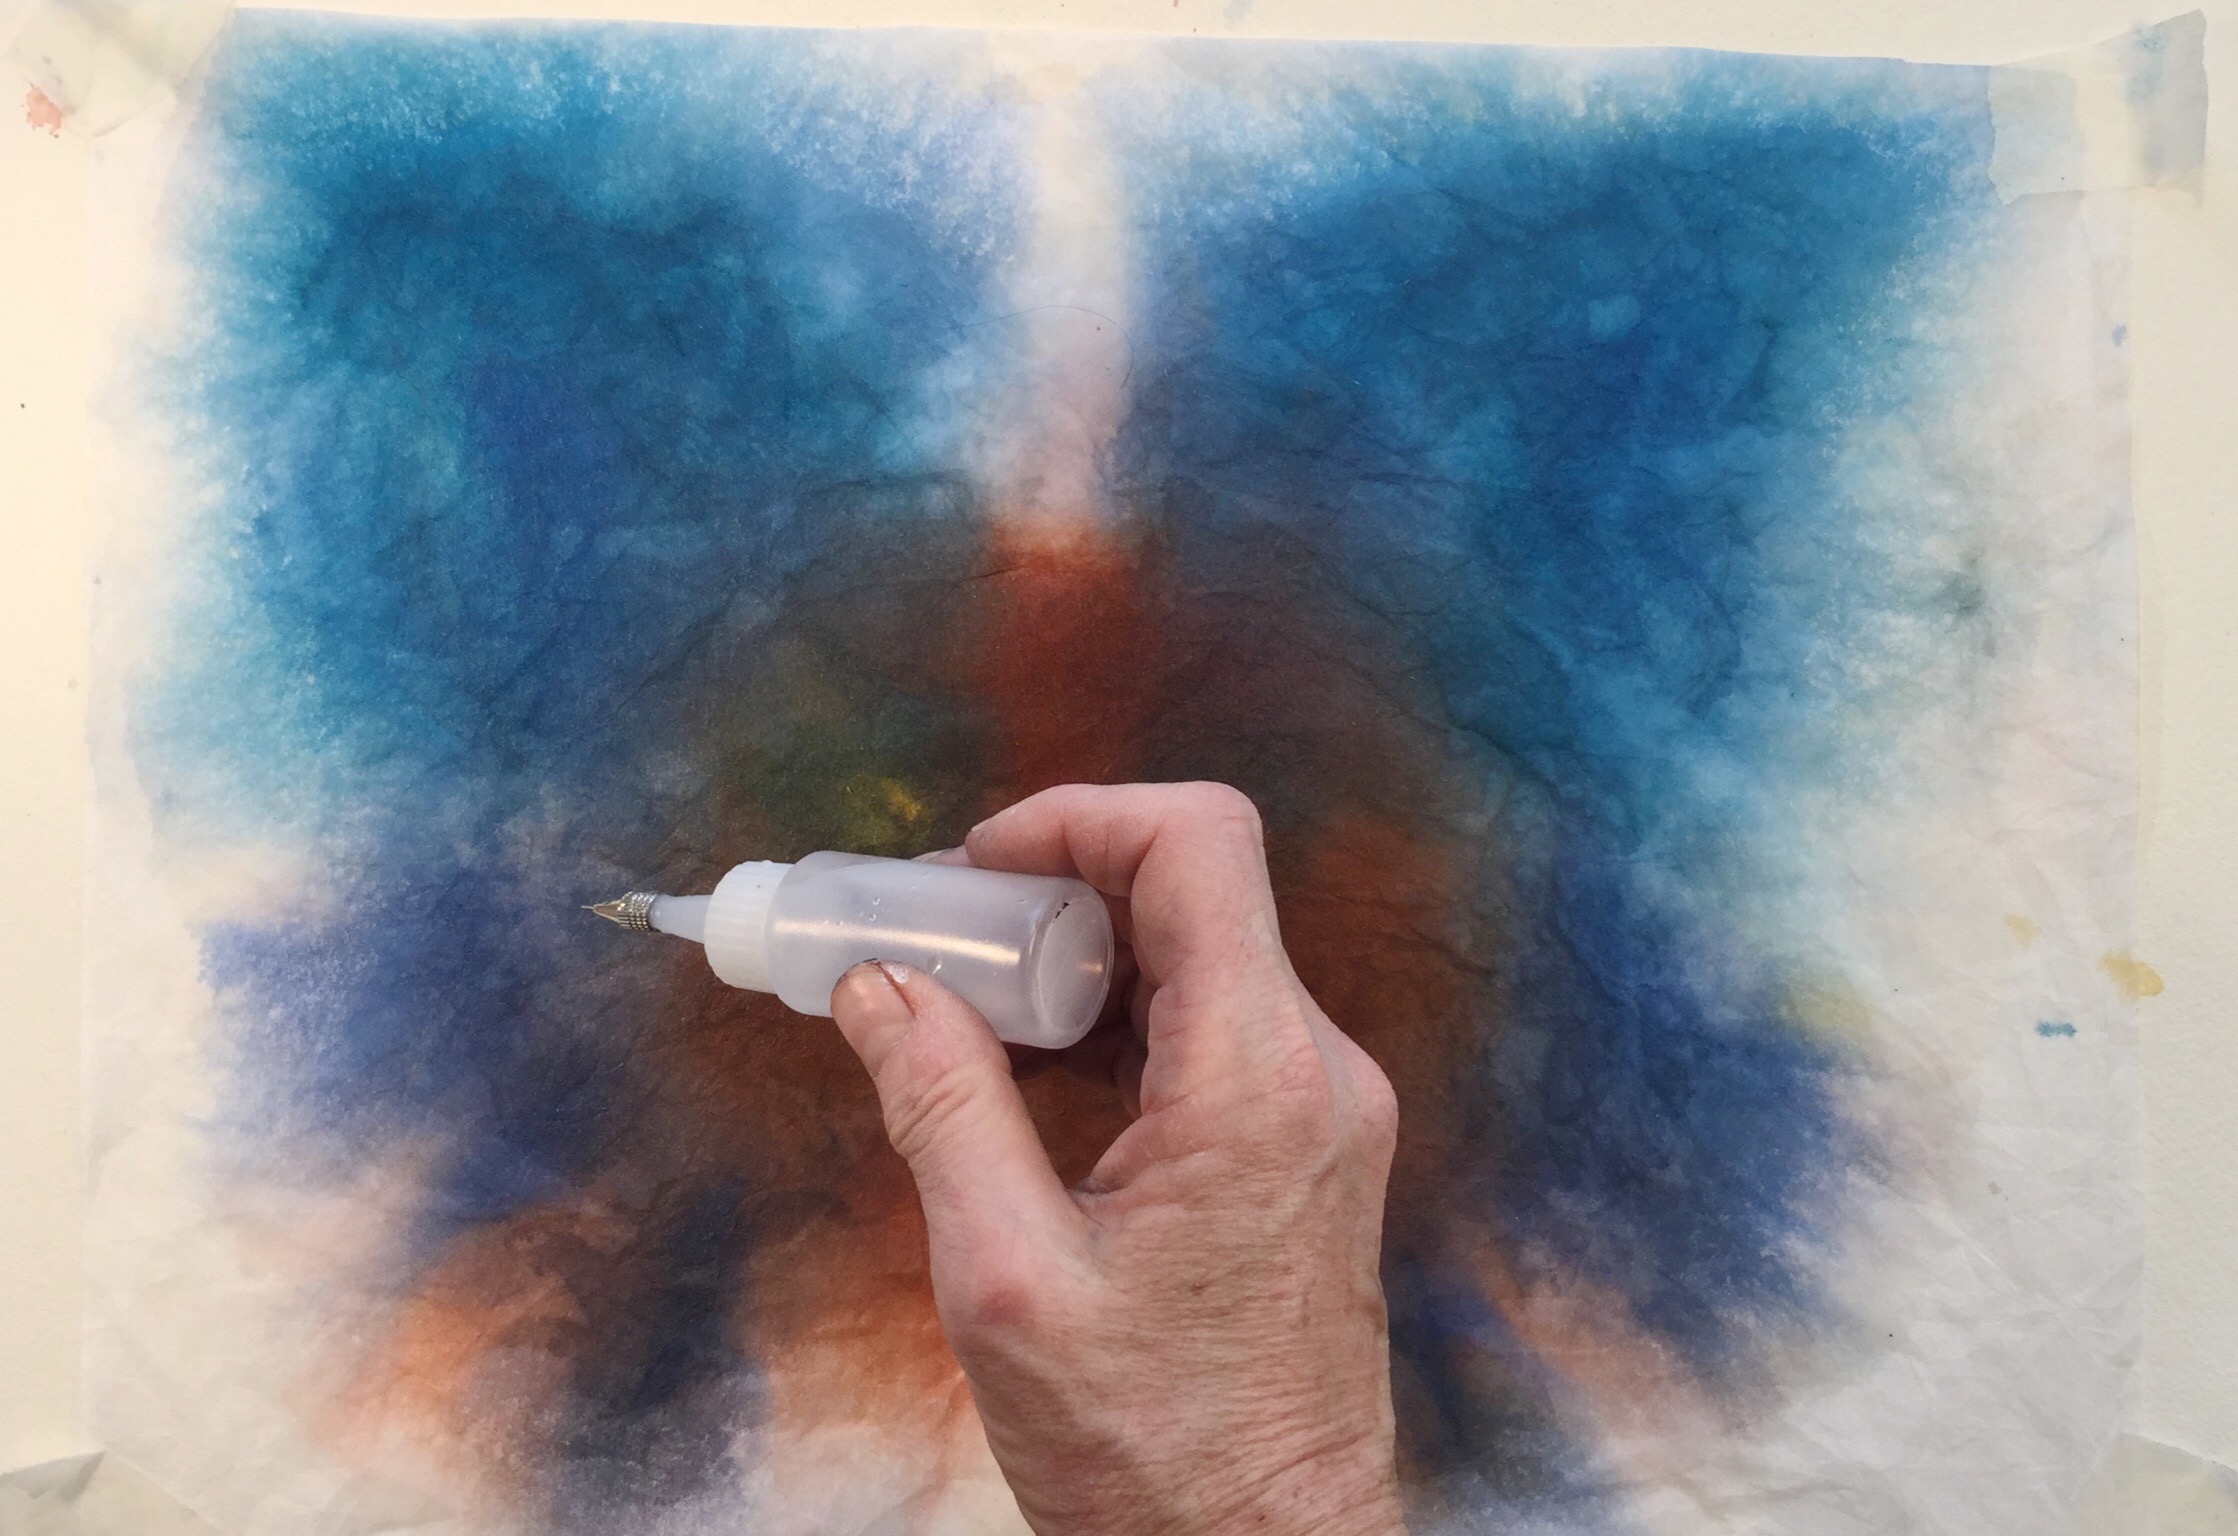
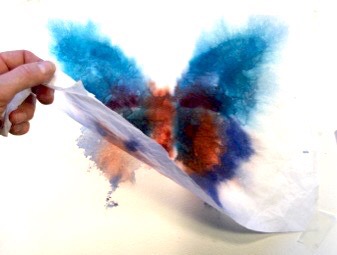
It’s the combination of scrunched up paper, loads of paint and lots of water that starts to produce the lovely textures as the tissue dries. The tissue is left till almost dry, if you take it off too soon all those textures will be lost
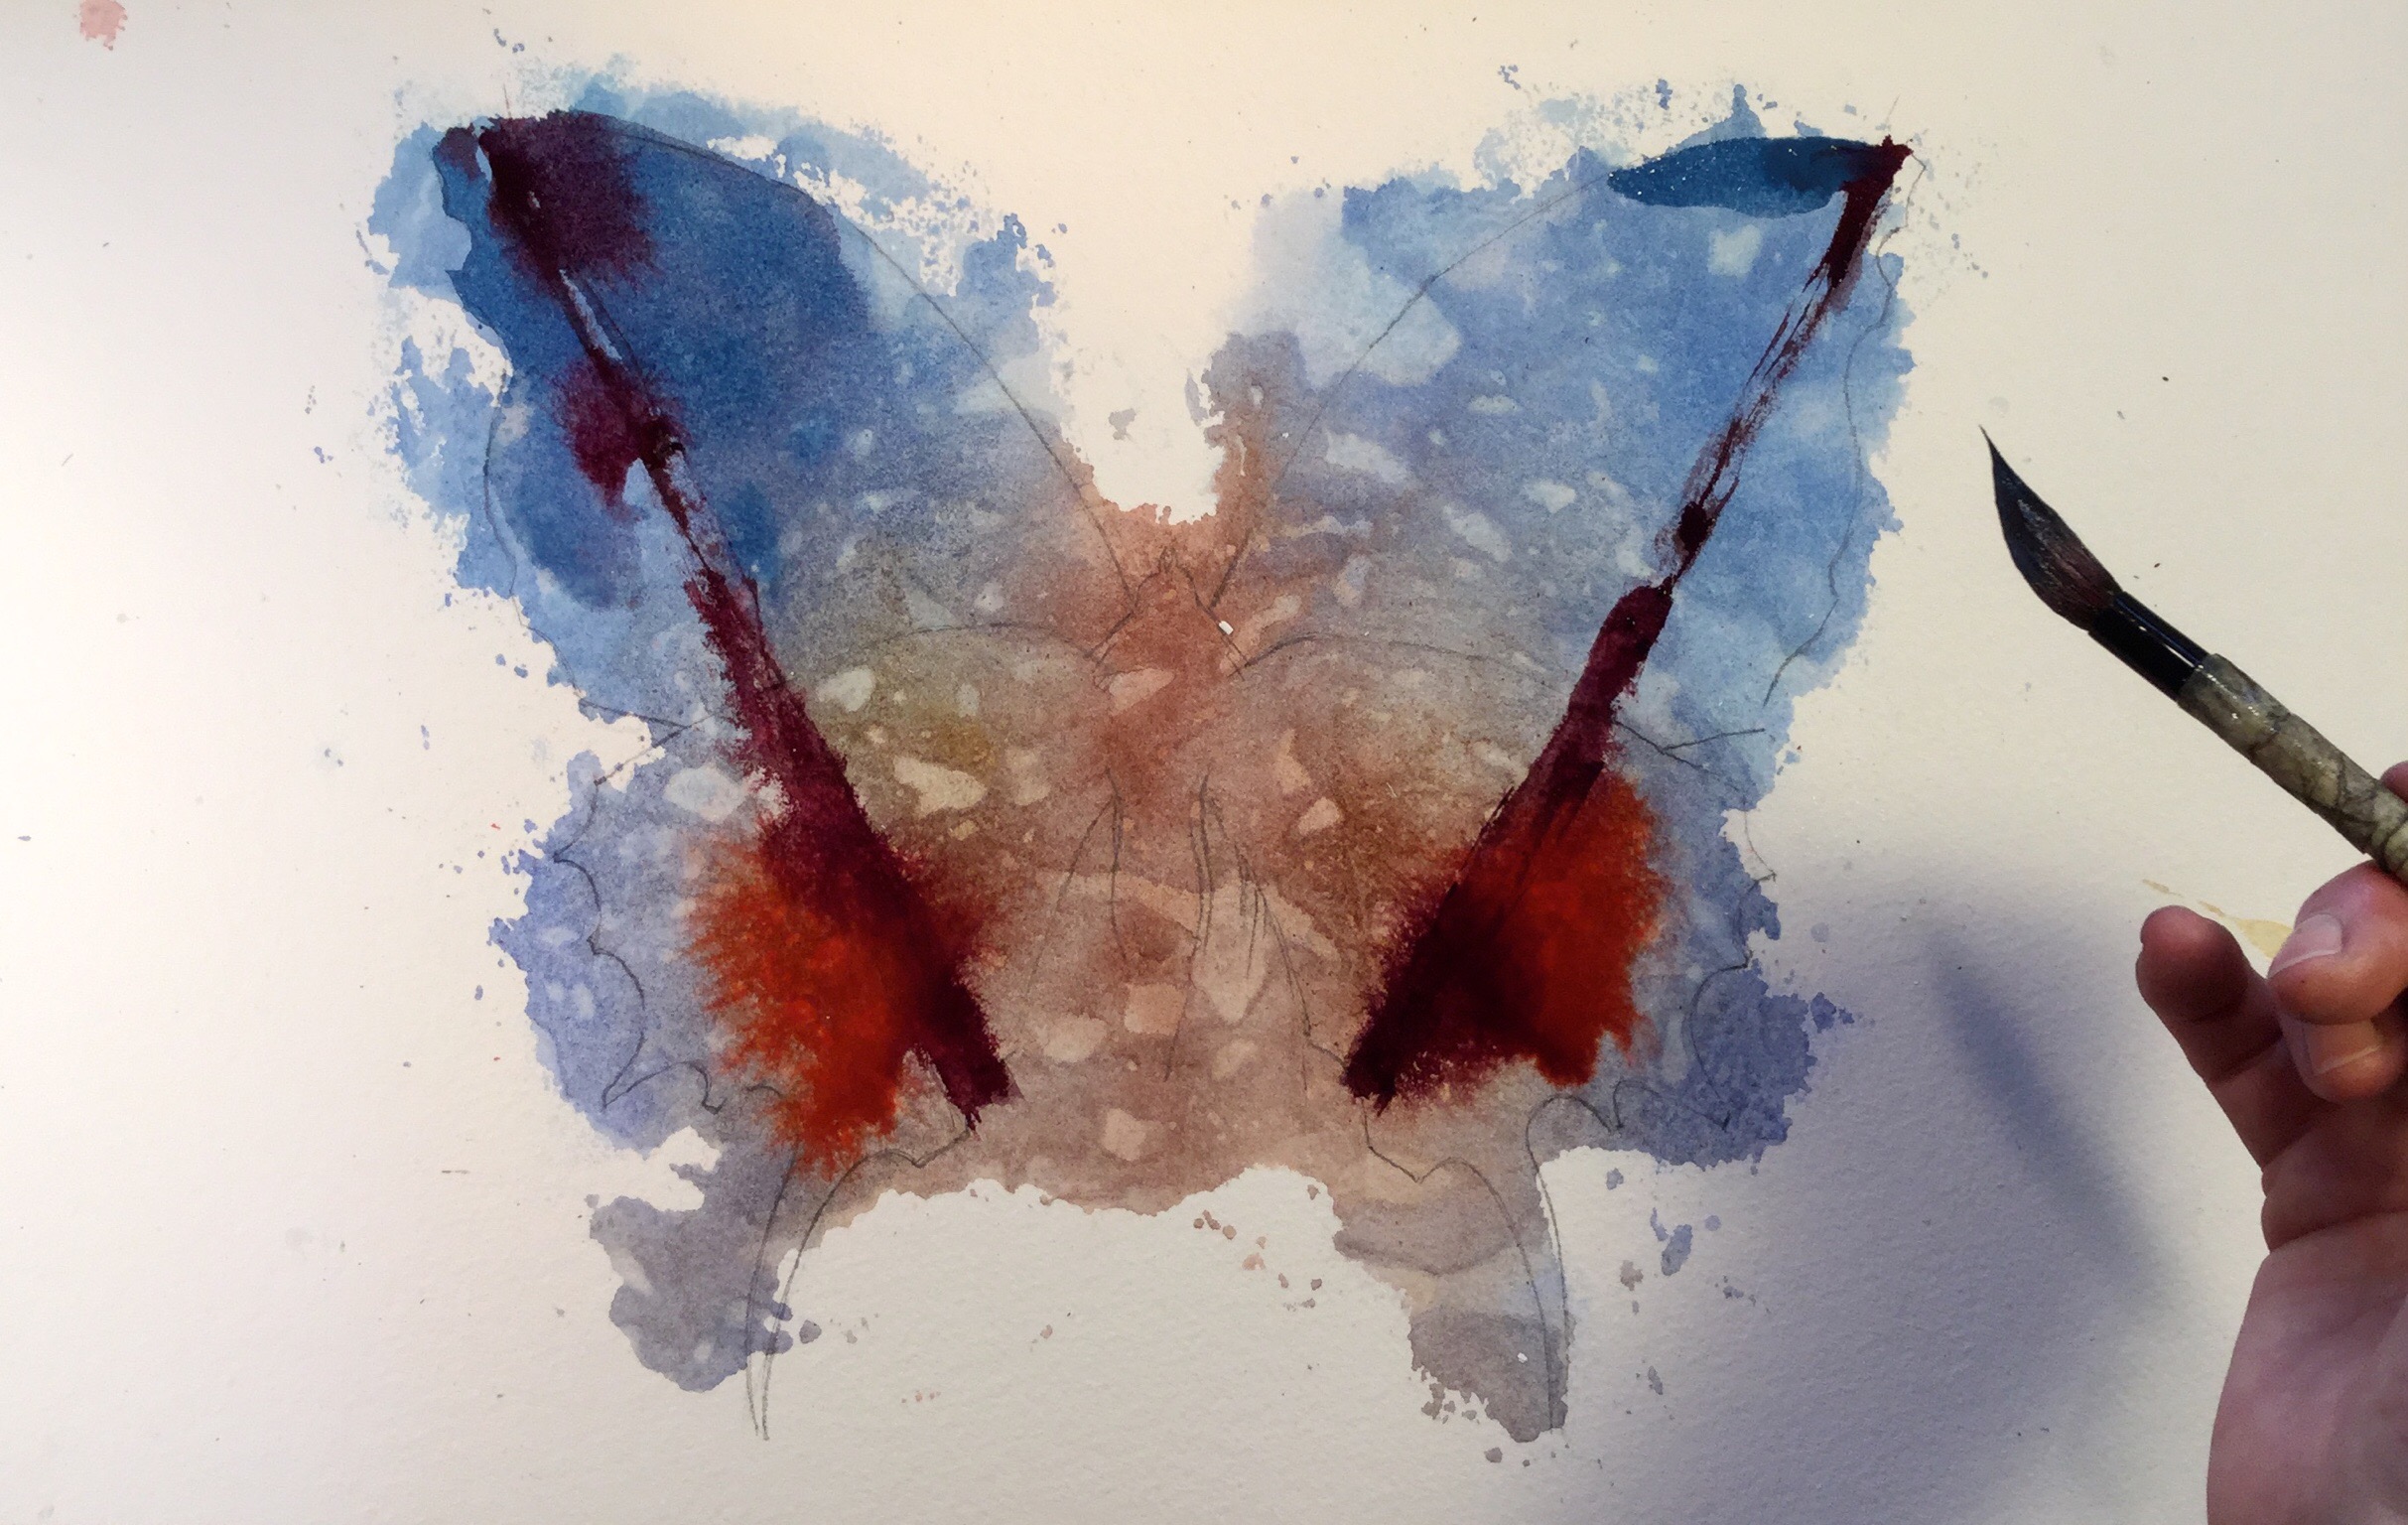 You can see the paint has gone well over the boundaries of the butterfly, but this gets fixed later. Now I start working pattern onto the wings, first by printing the long stripes with the edge of a piece of mount board or card using perylene violet and permanent brown, using a water spray to loosen the hard edges a little and dropping in more paint with a brush. I mean ‘dropping’ ; if you load your brush with a rich wet mix and touch it to a wet area the brush will unload, no need to stroke or brush it on, this just moves paint around unecessarily
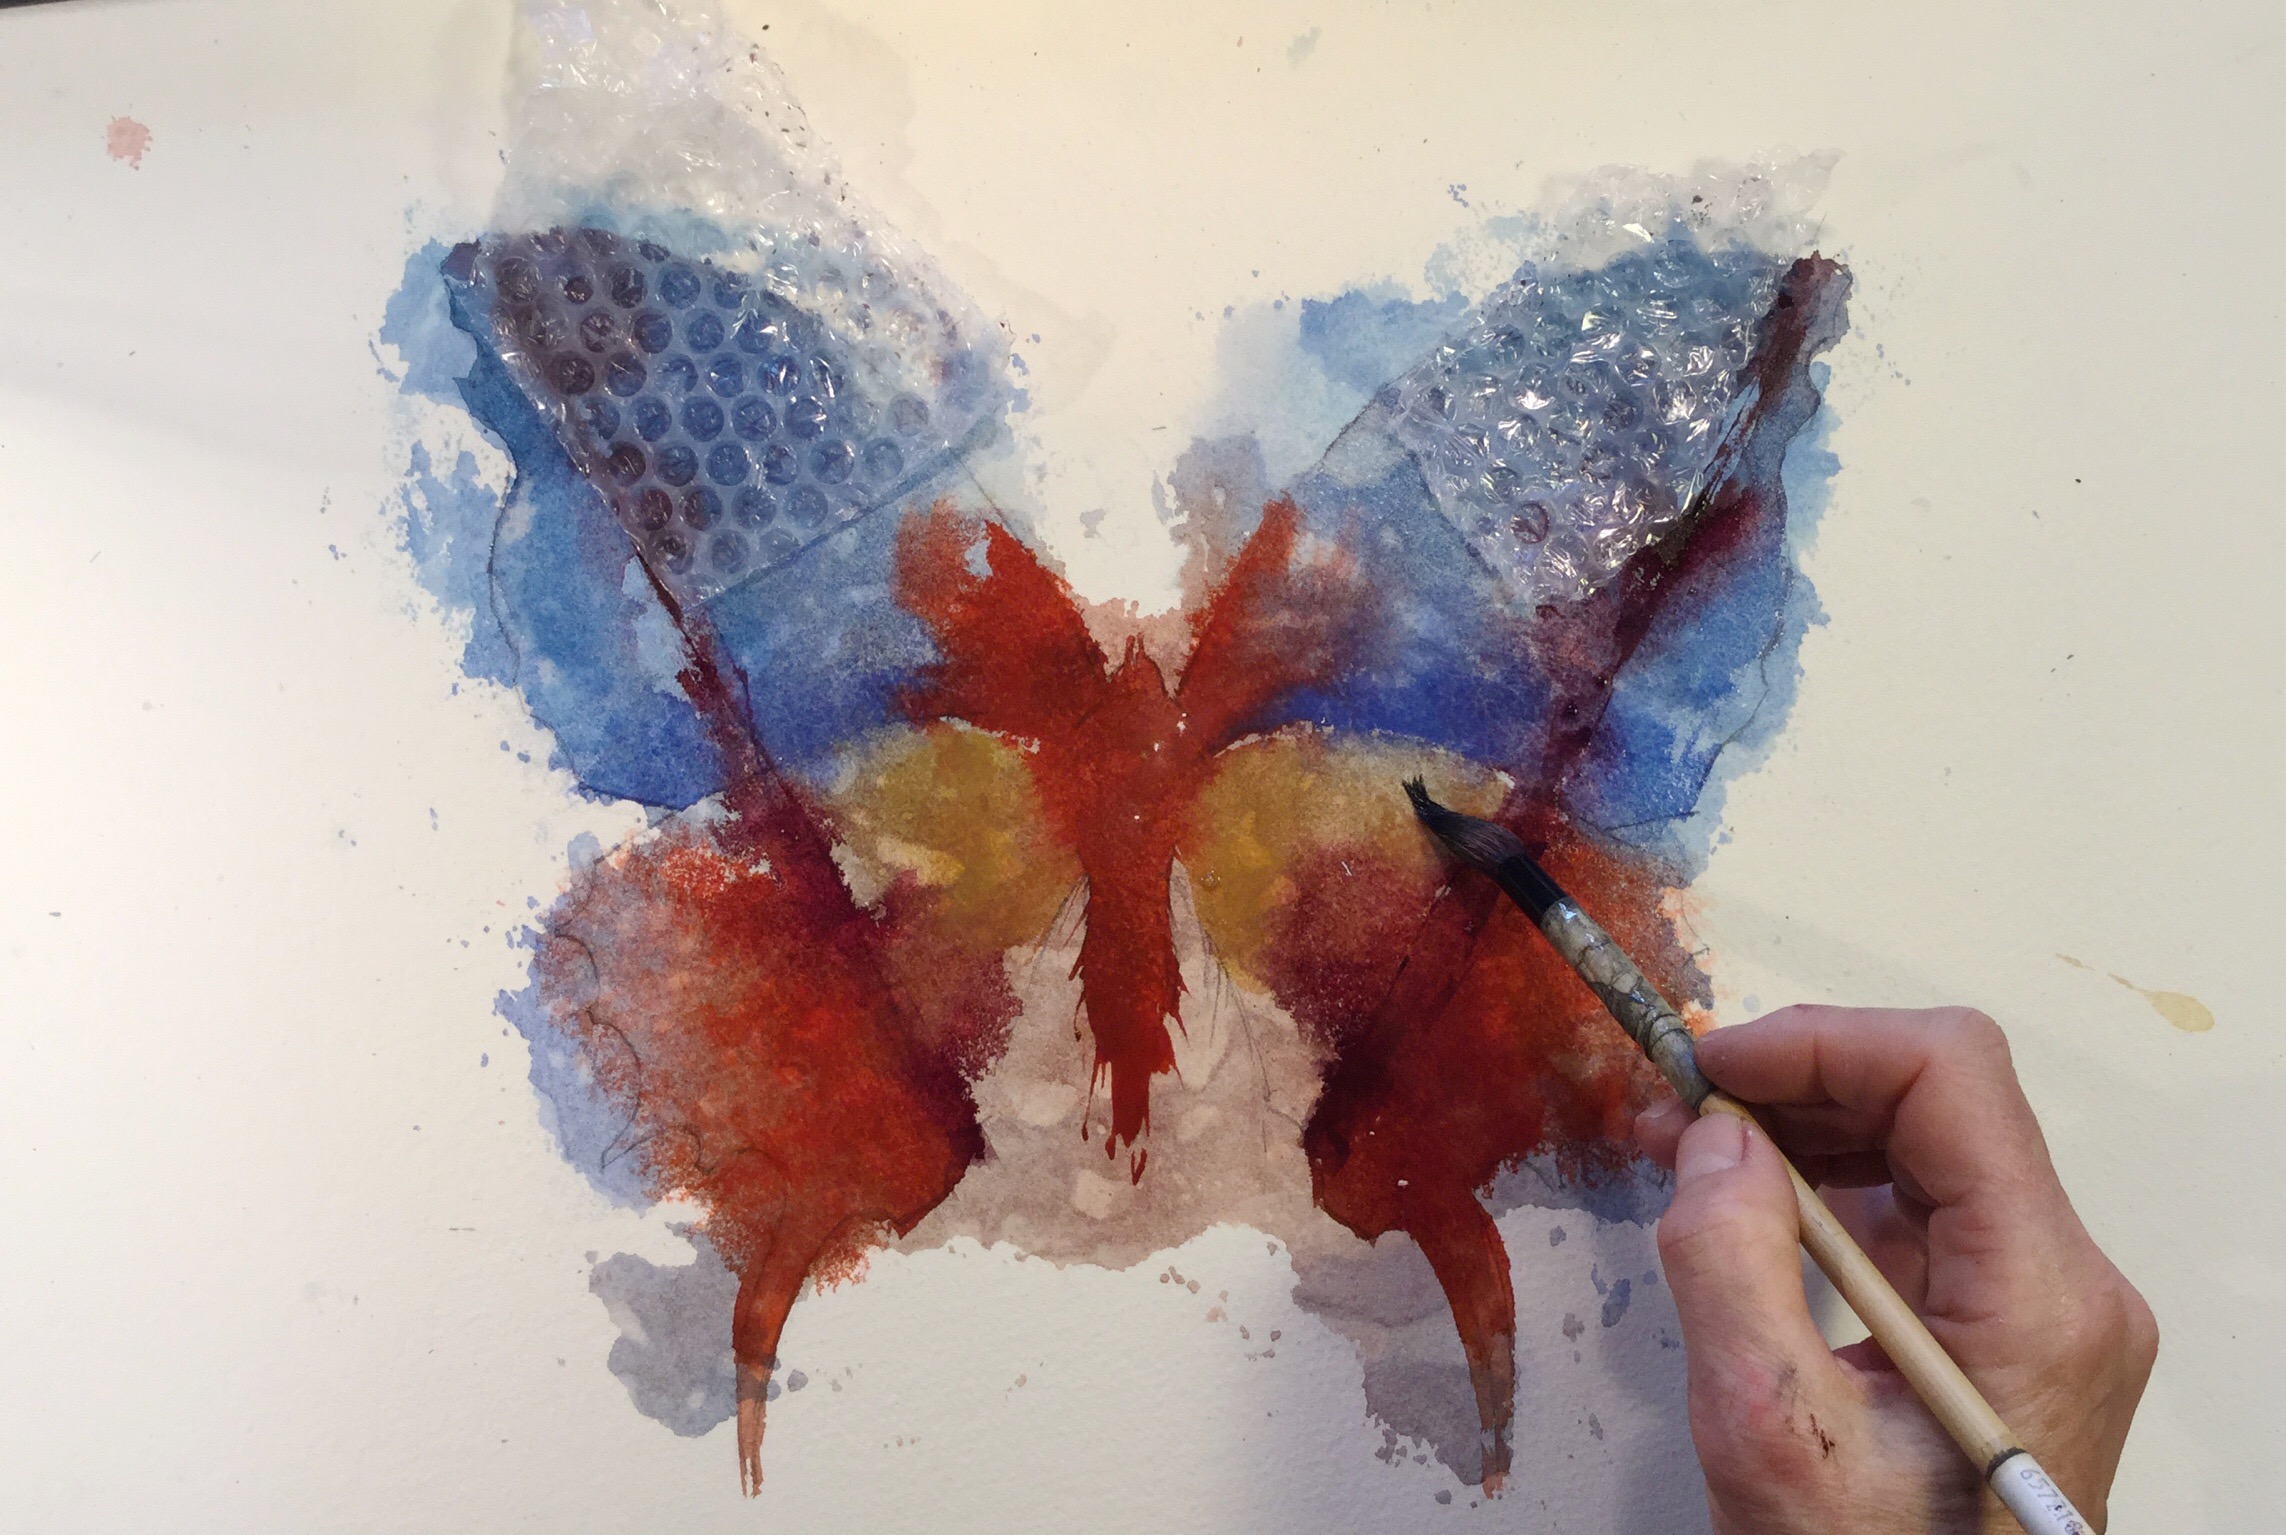 Continuing to add more colour, yellow ochre, transparent pyrrol orange, and pressing the bits of bubble wrap into damp areas of the blue and only removing it once the paint below is dry, creating more texture
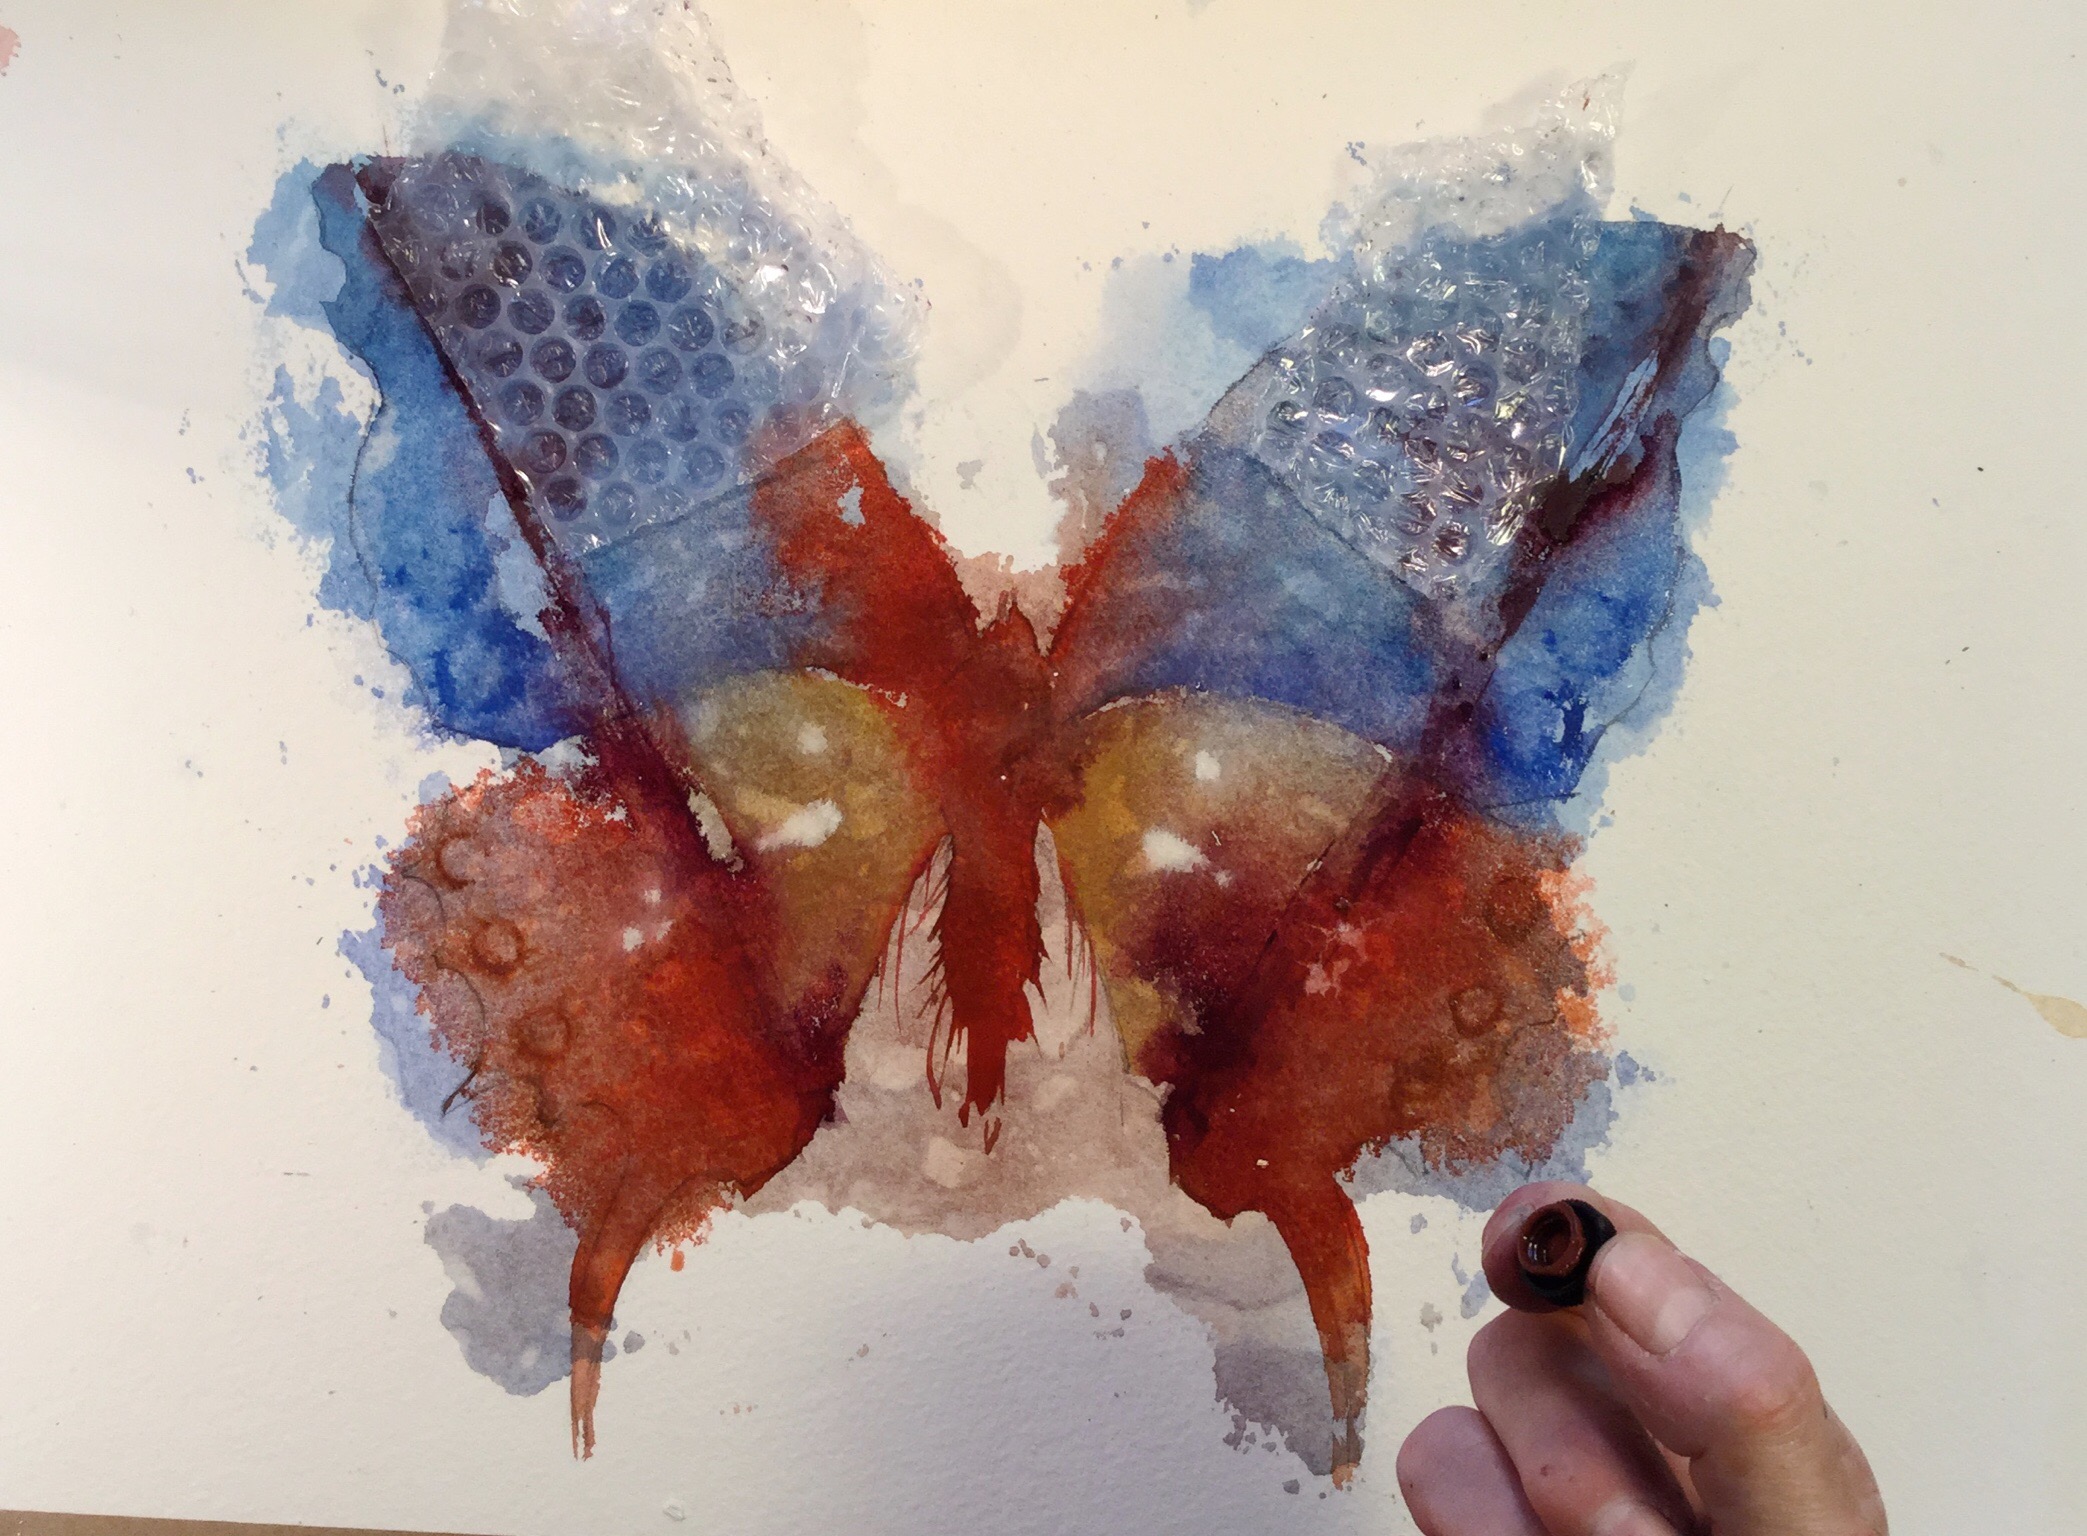
Using the cap of a paint tube pressed into wet paint to make the circles on the bottom wings. It’s back to school craft projects folks!
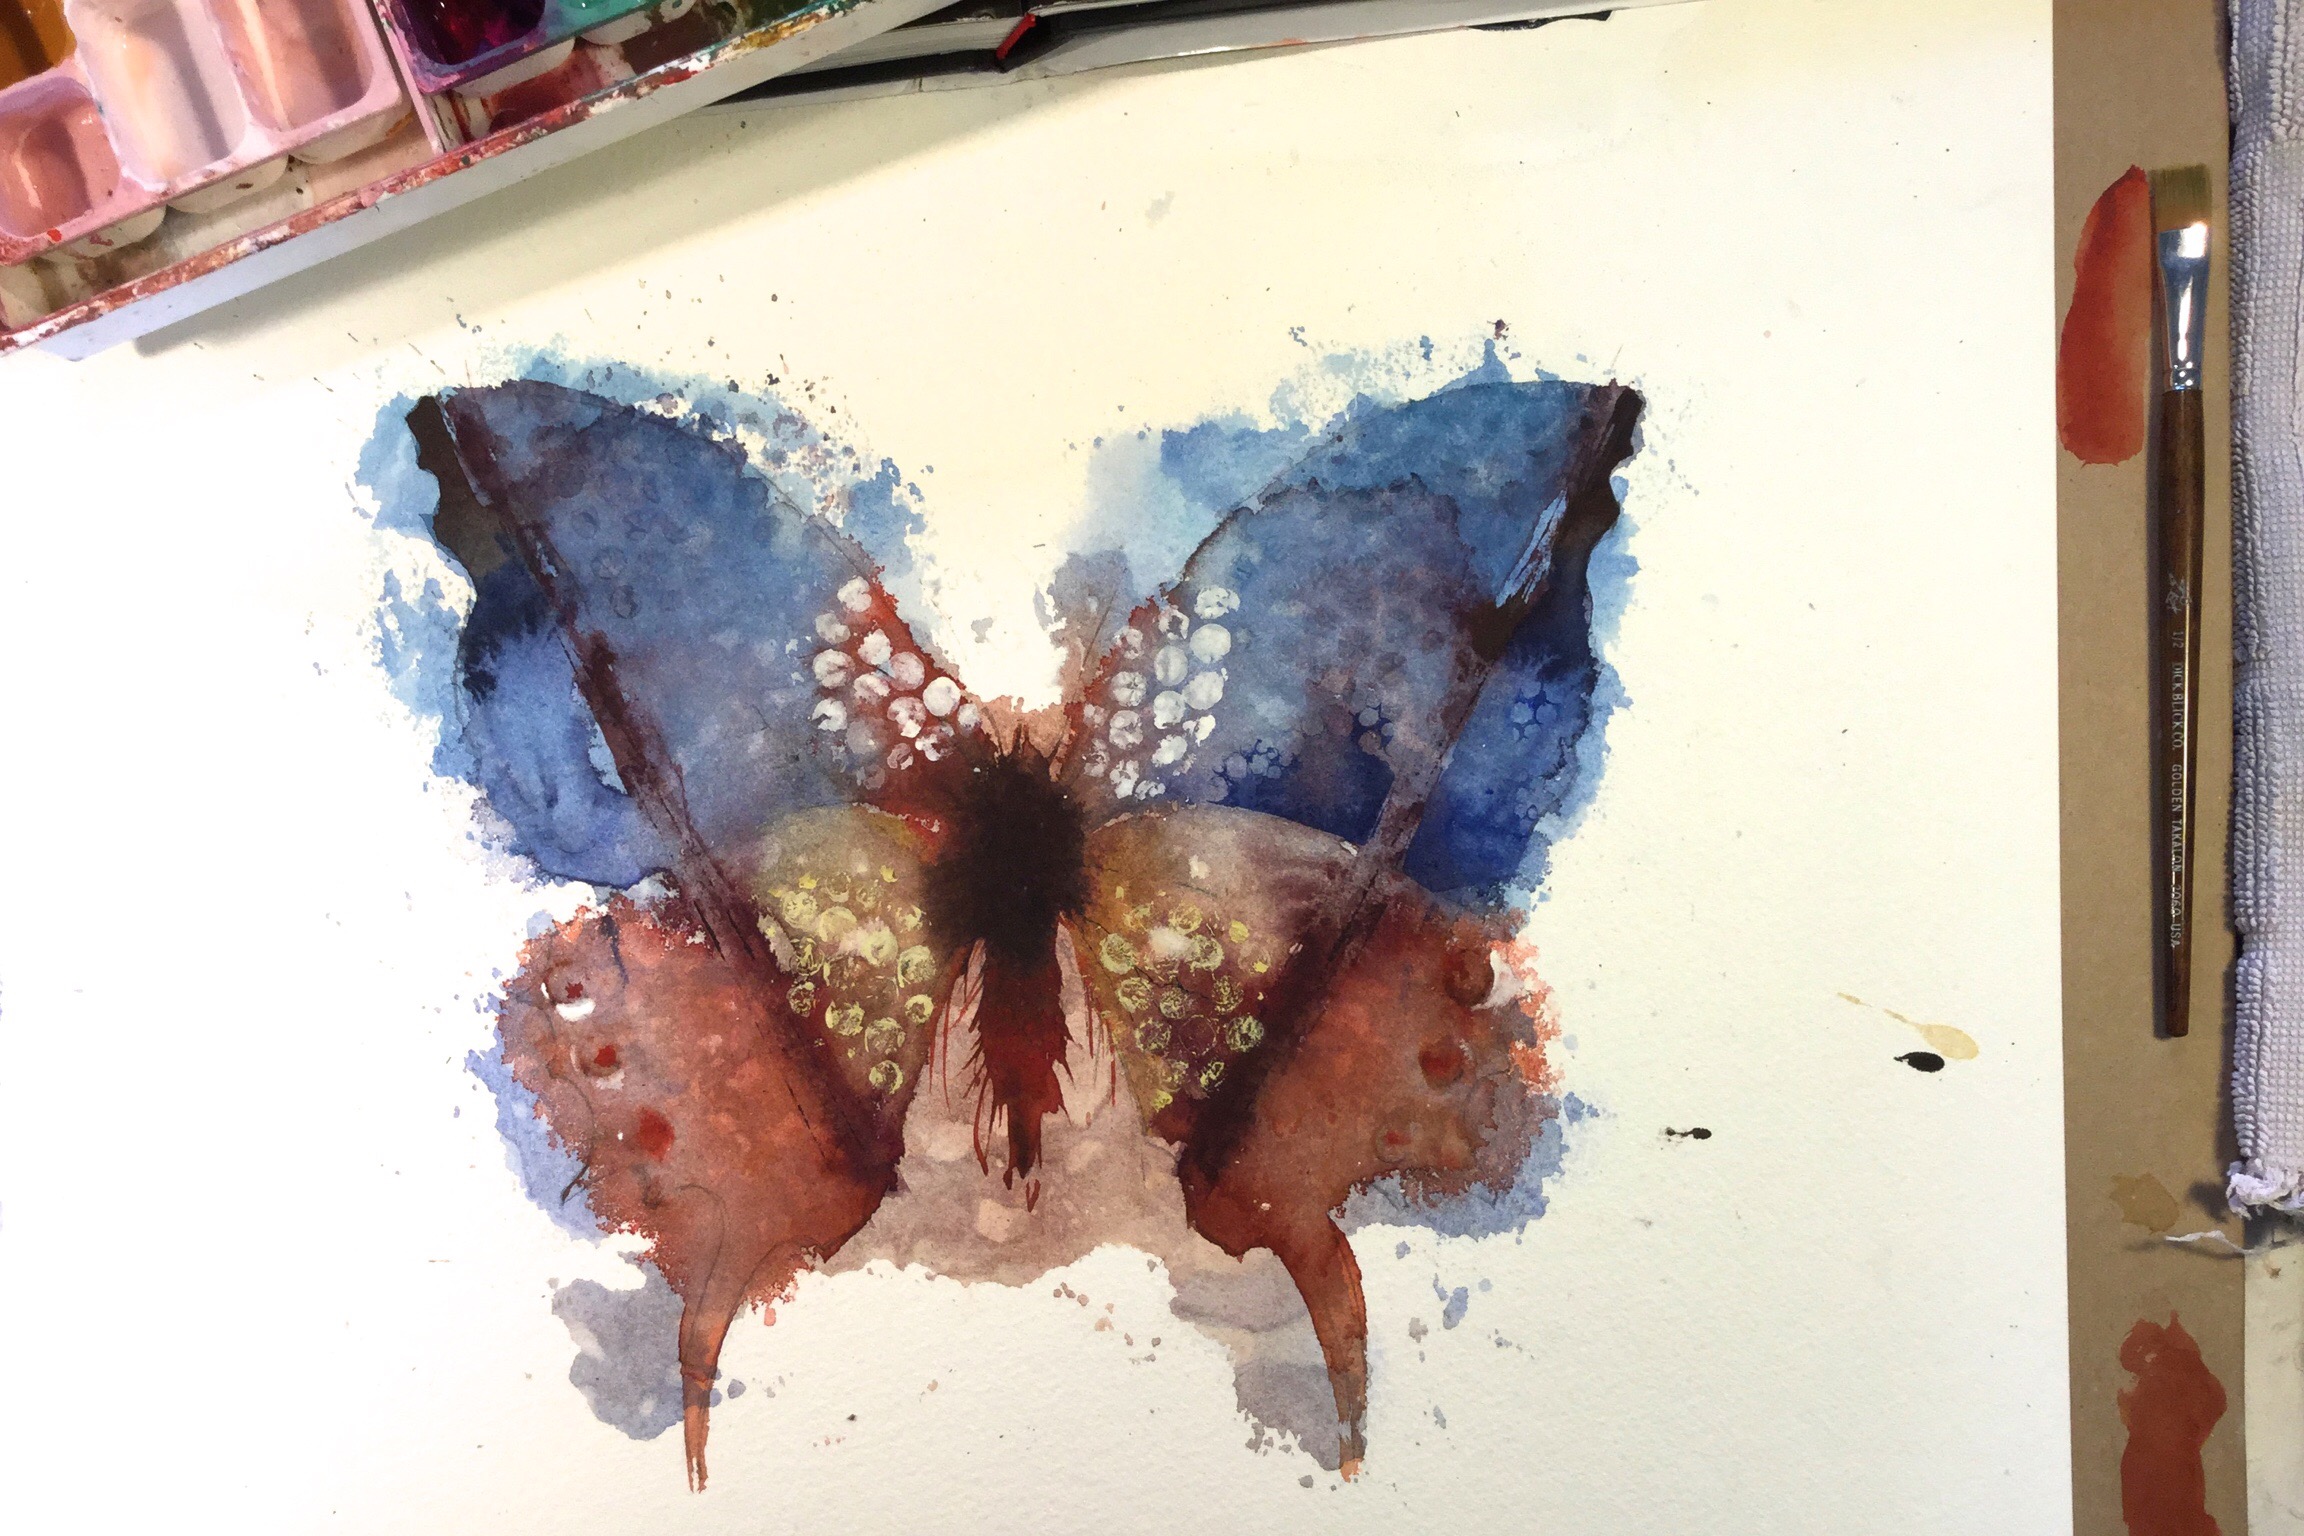
Above. Here I’ve rollered some gouache (white mixed with a little yellow ochre, it’s more opaque than watercolour whch is what I needed here) and printed onto both upper and lower wings
Below. With a Prolene sword brush I add some more detailed patterning
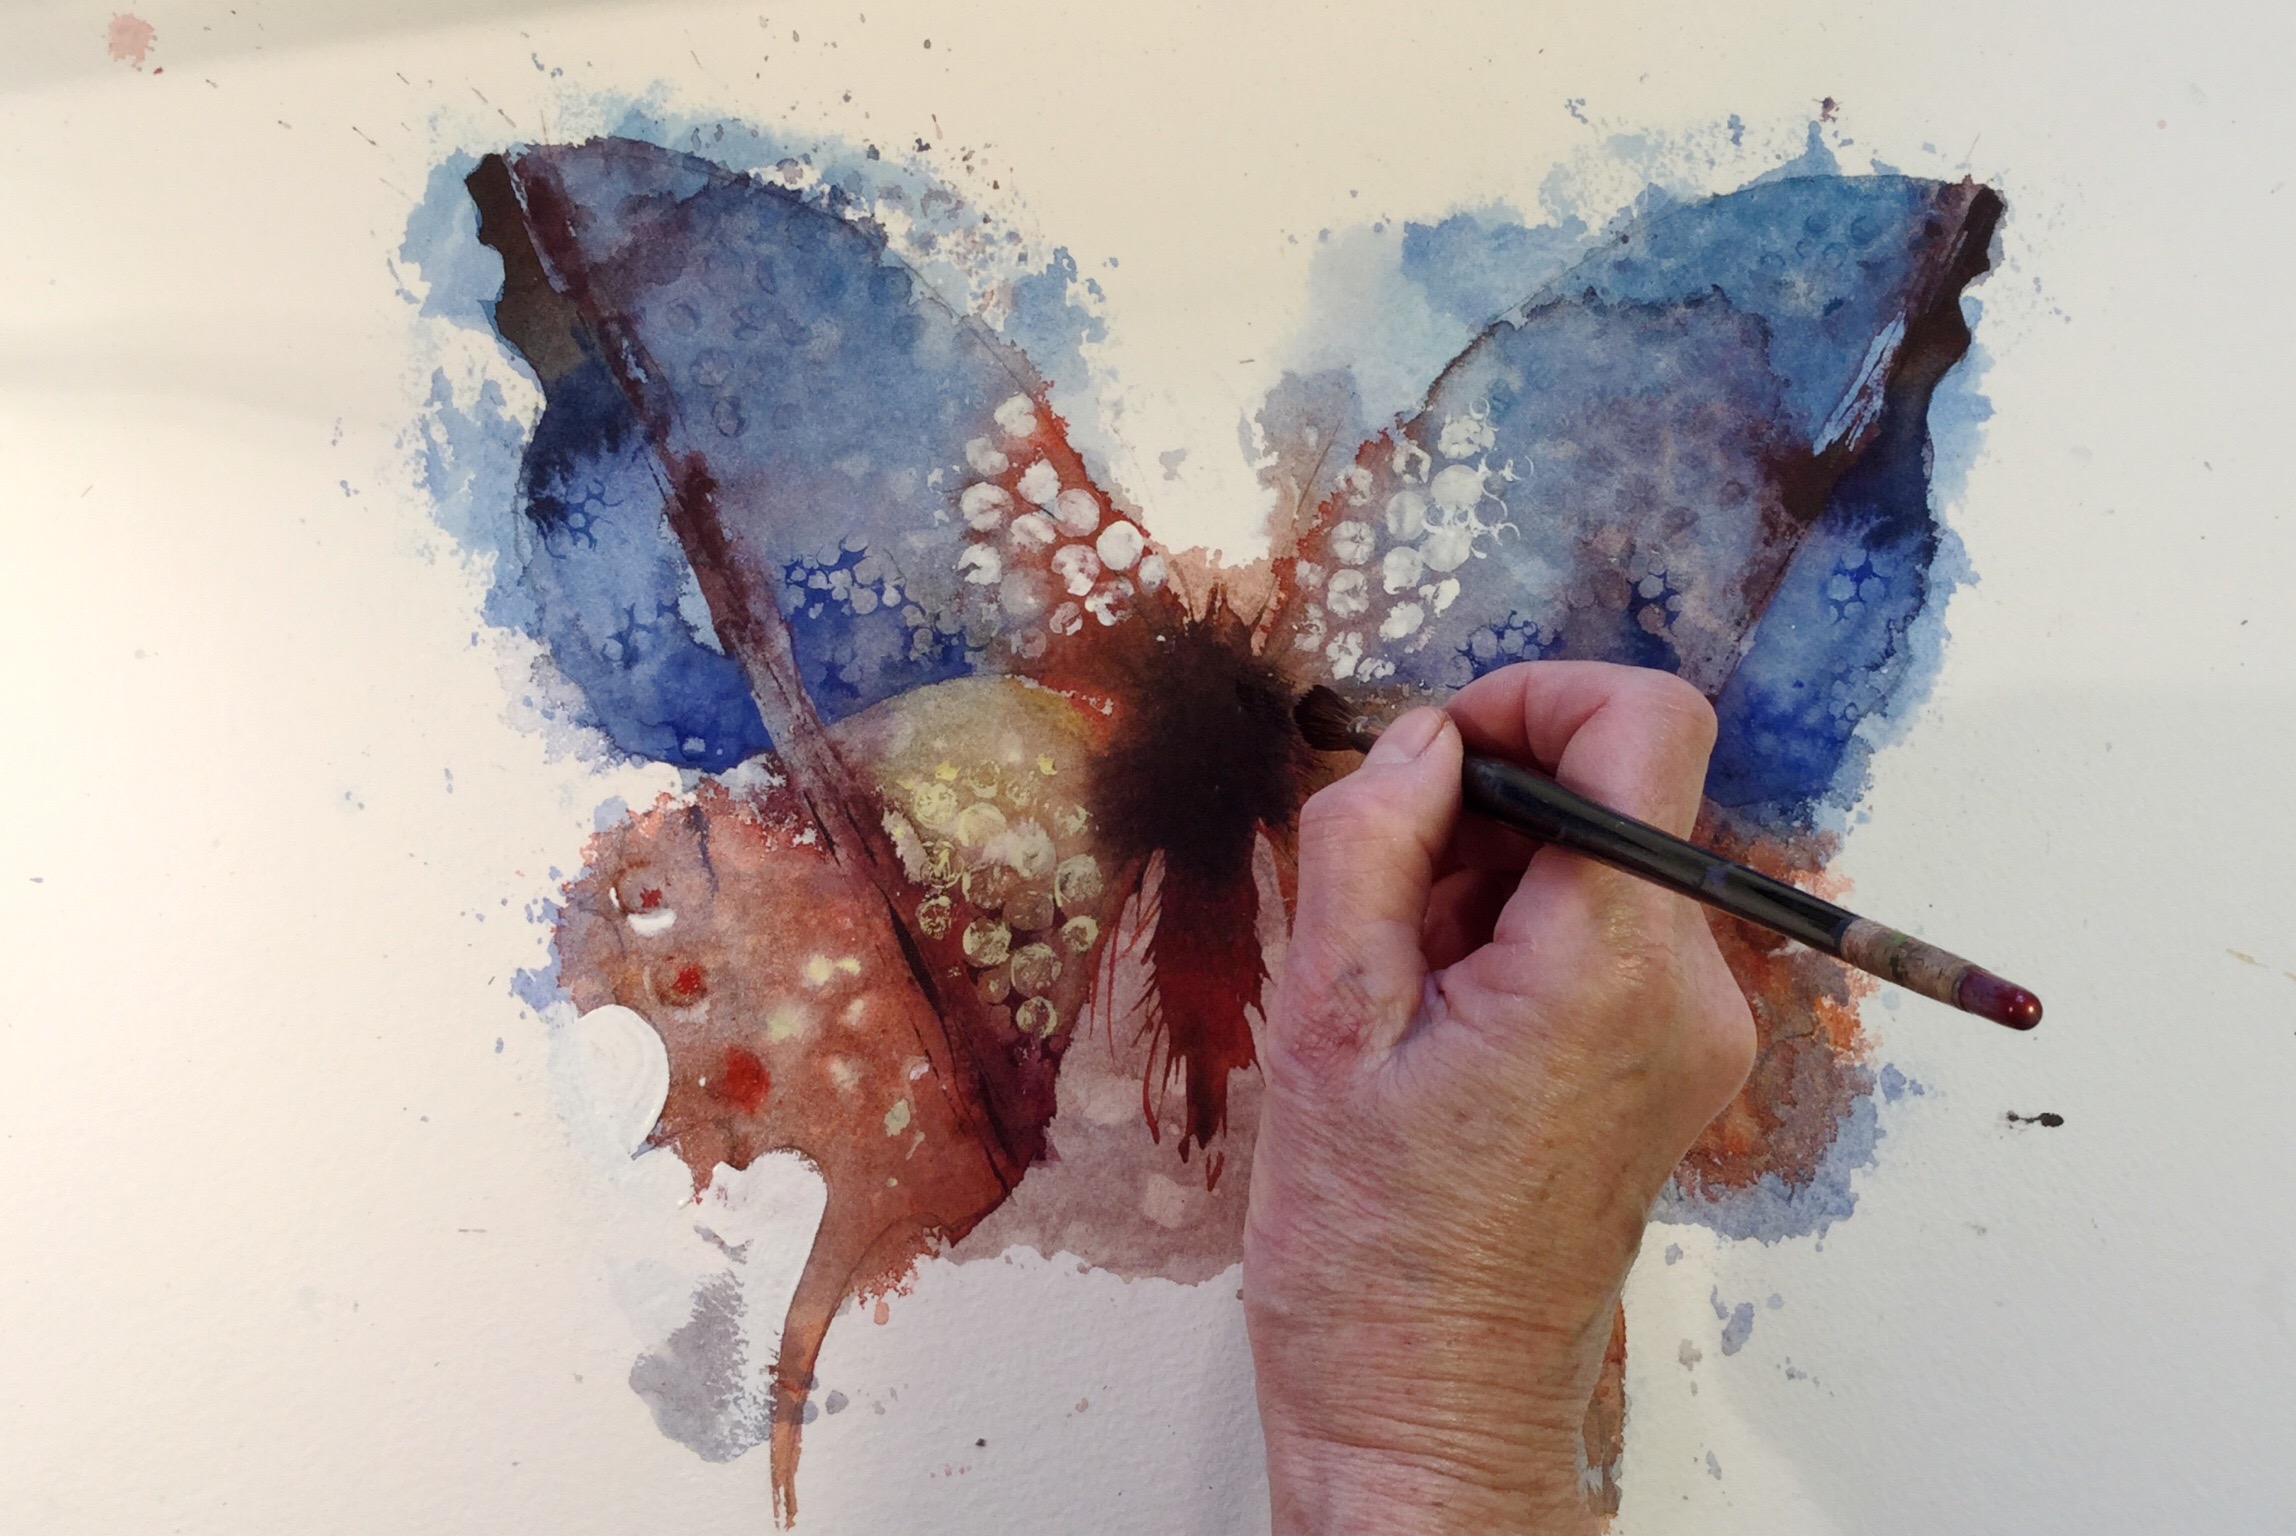
And deepen the body of the butterfly
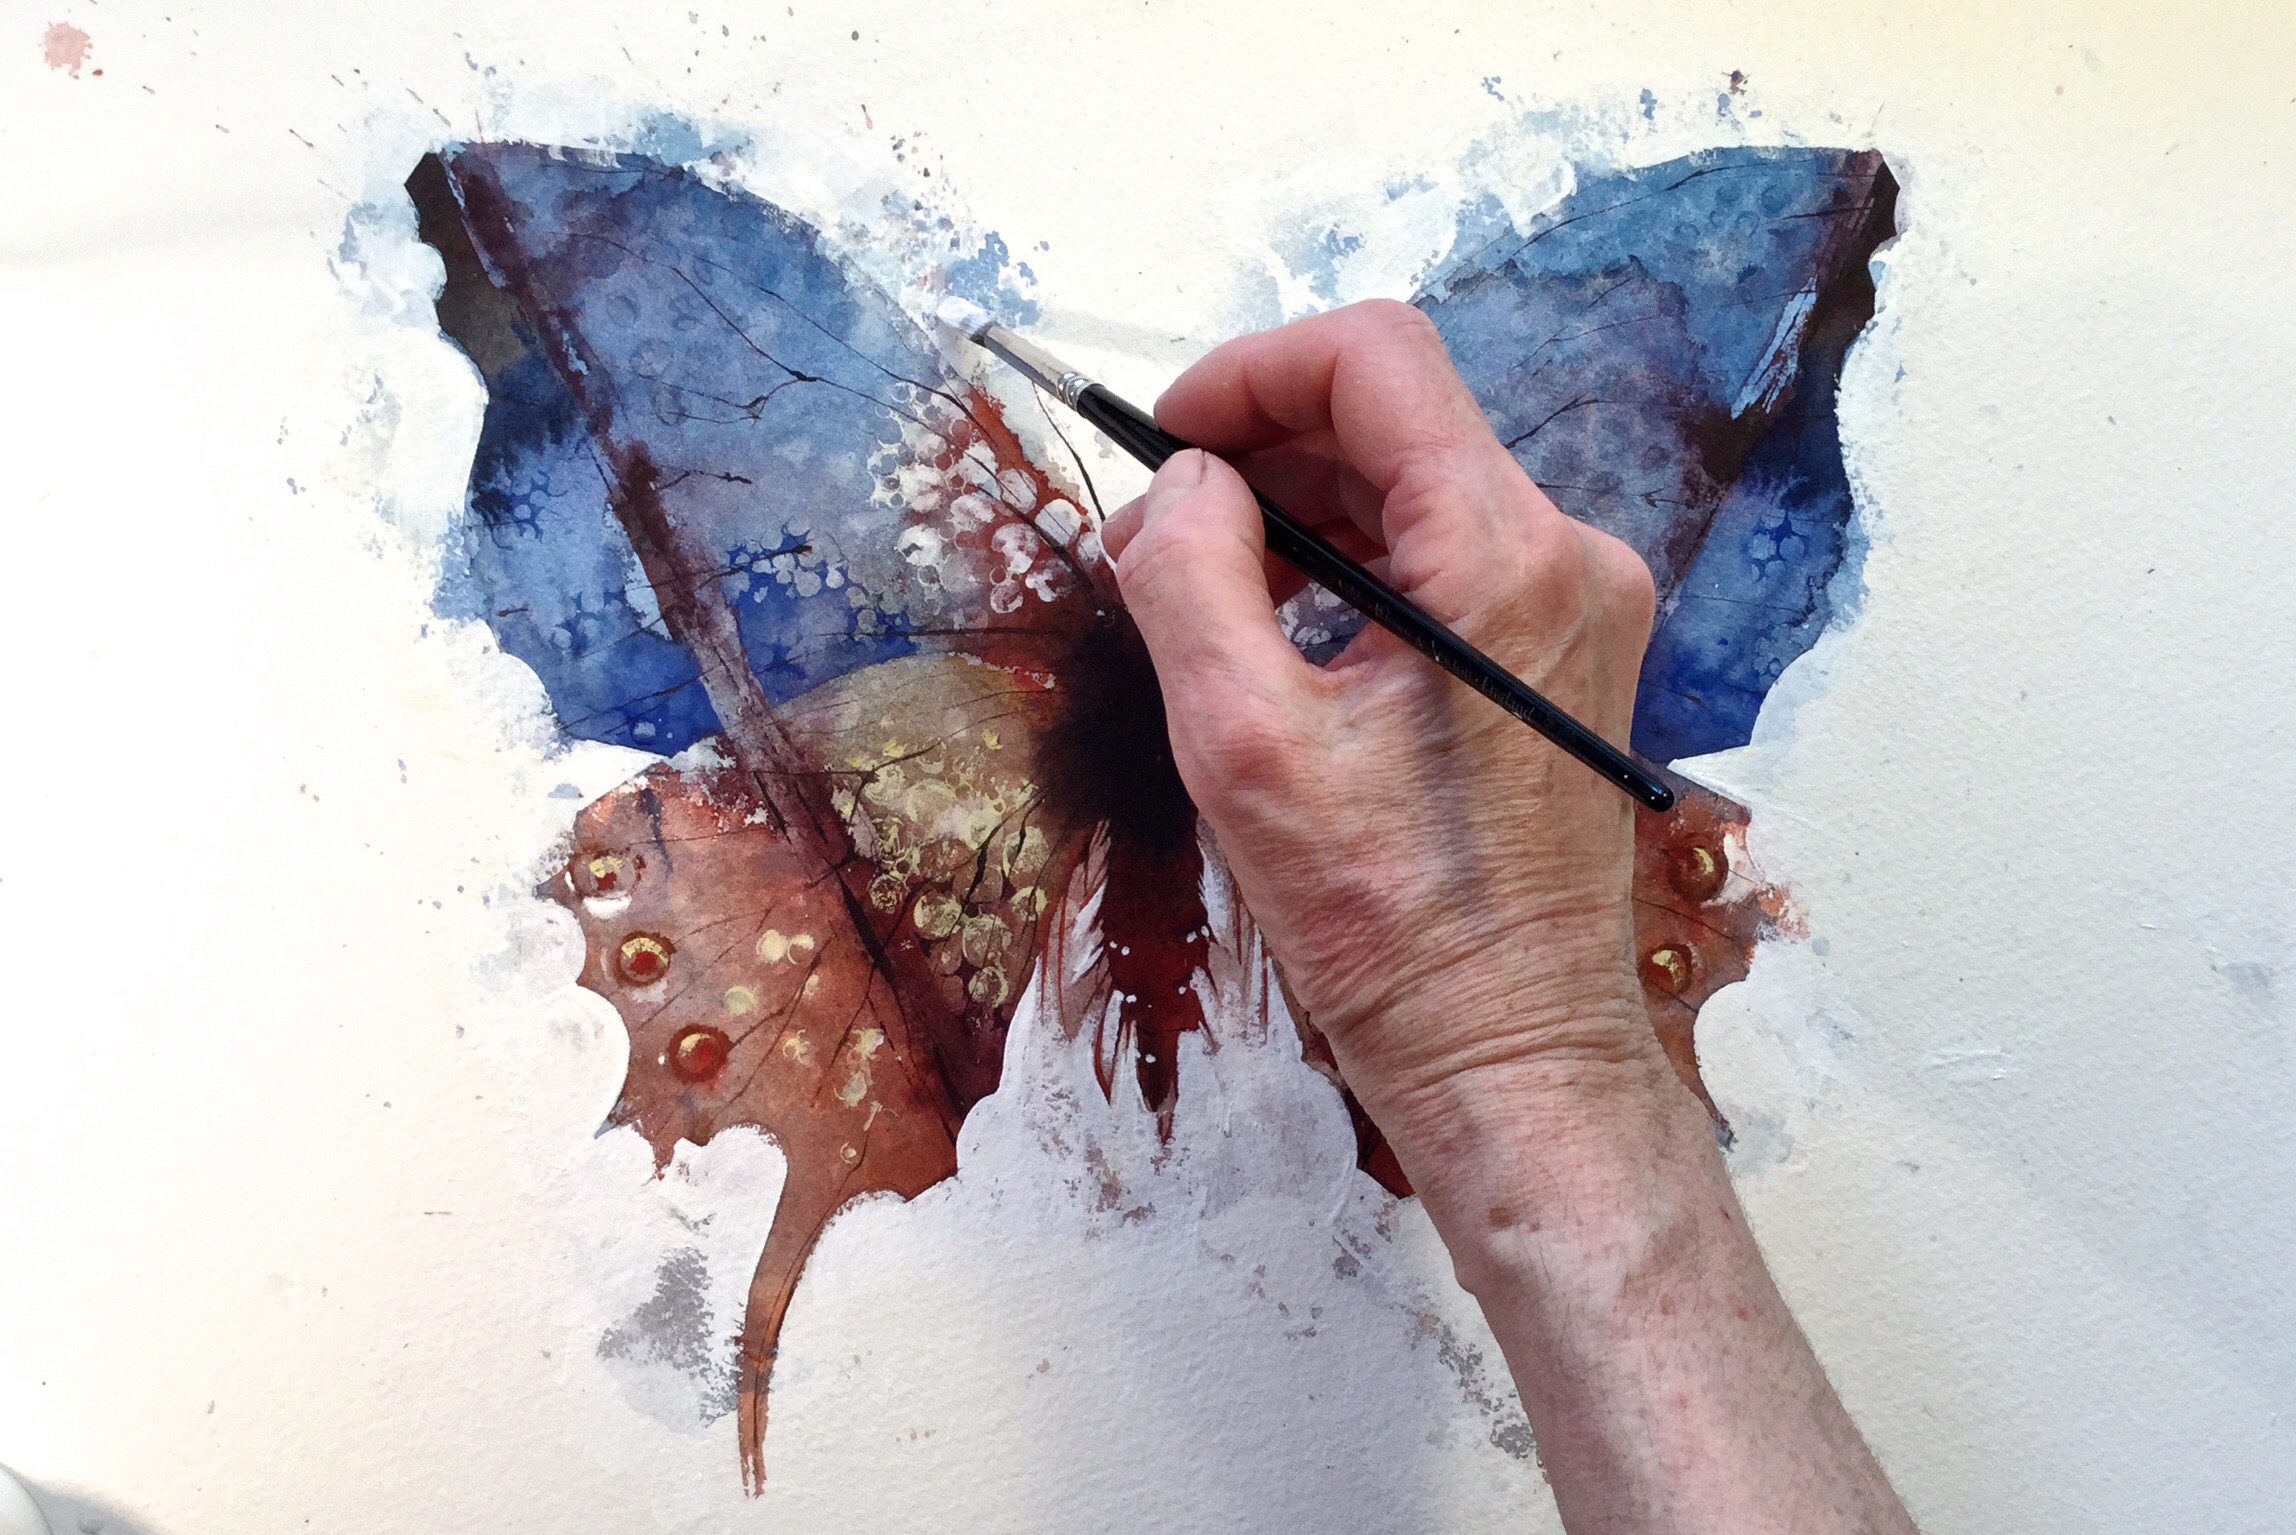
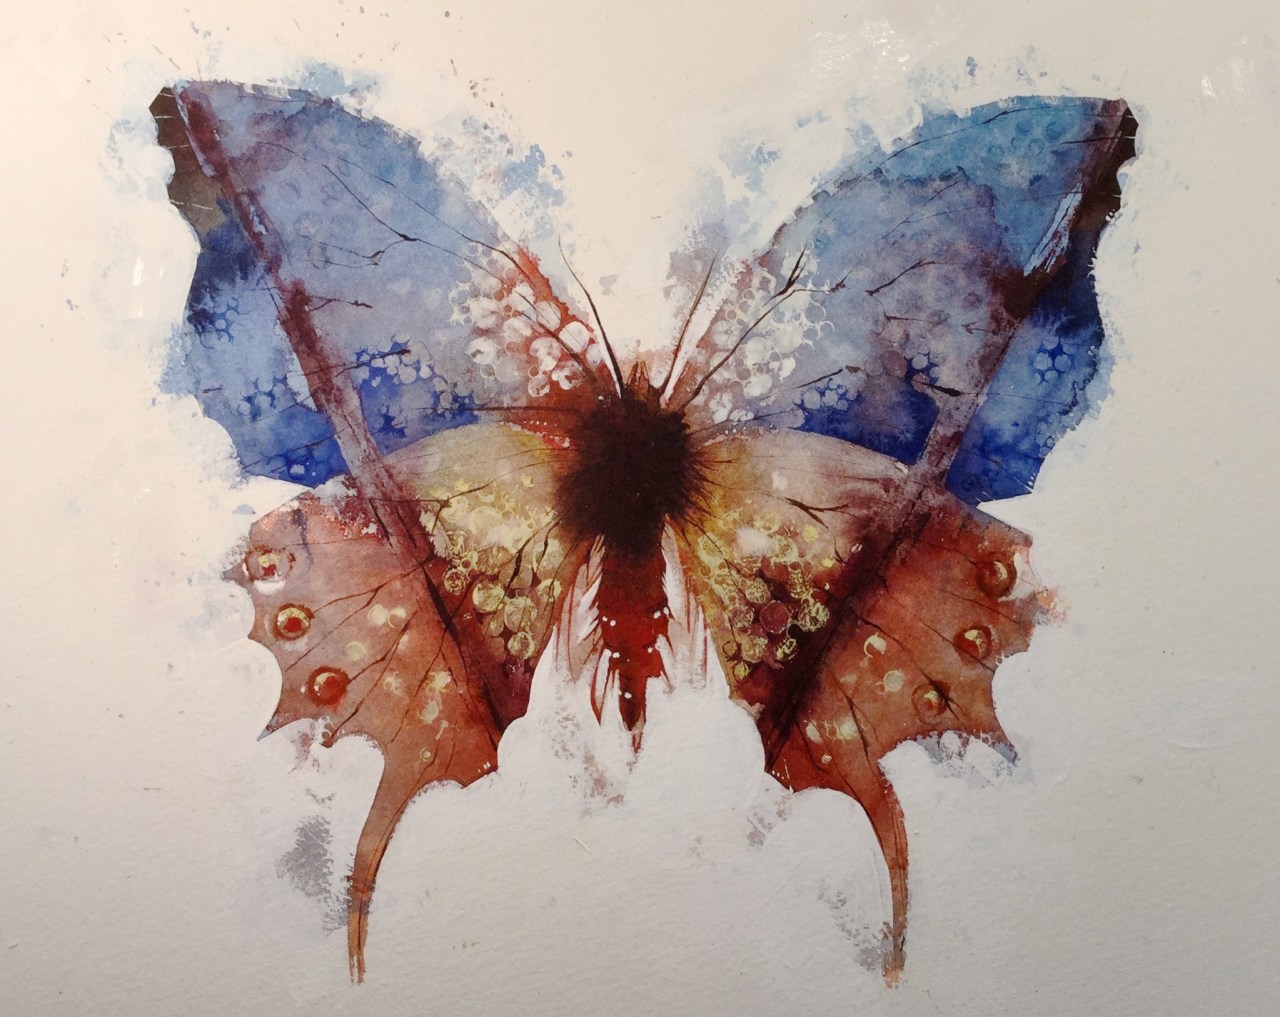
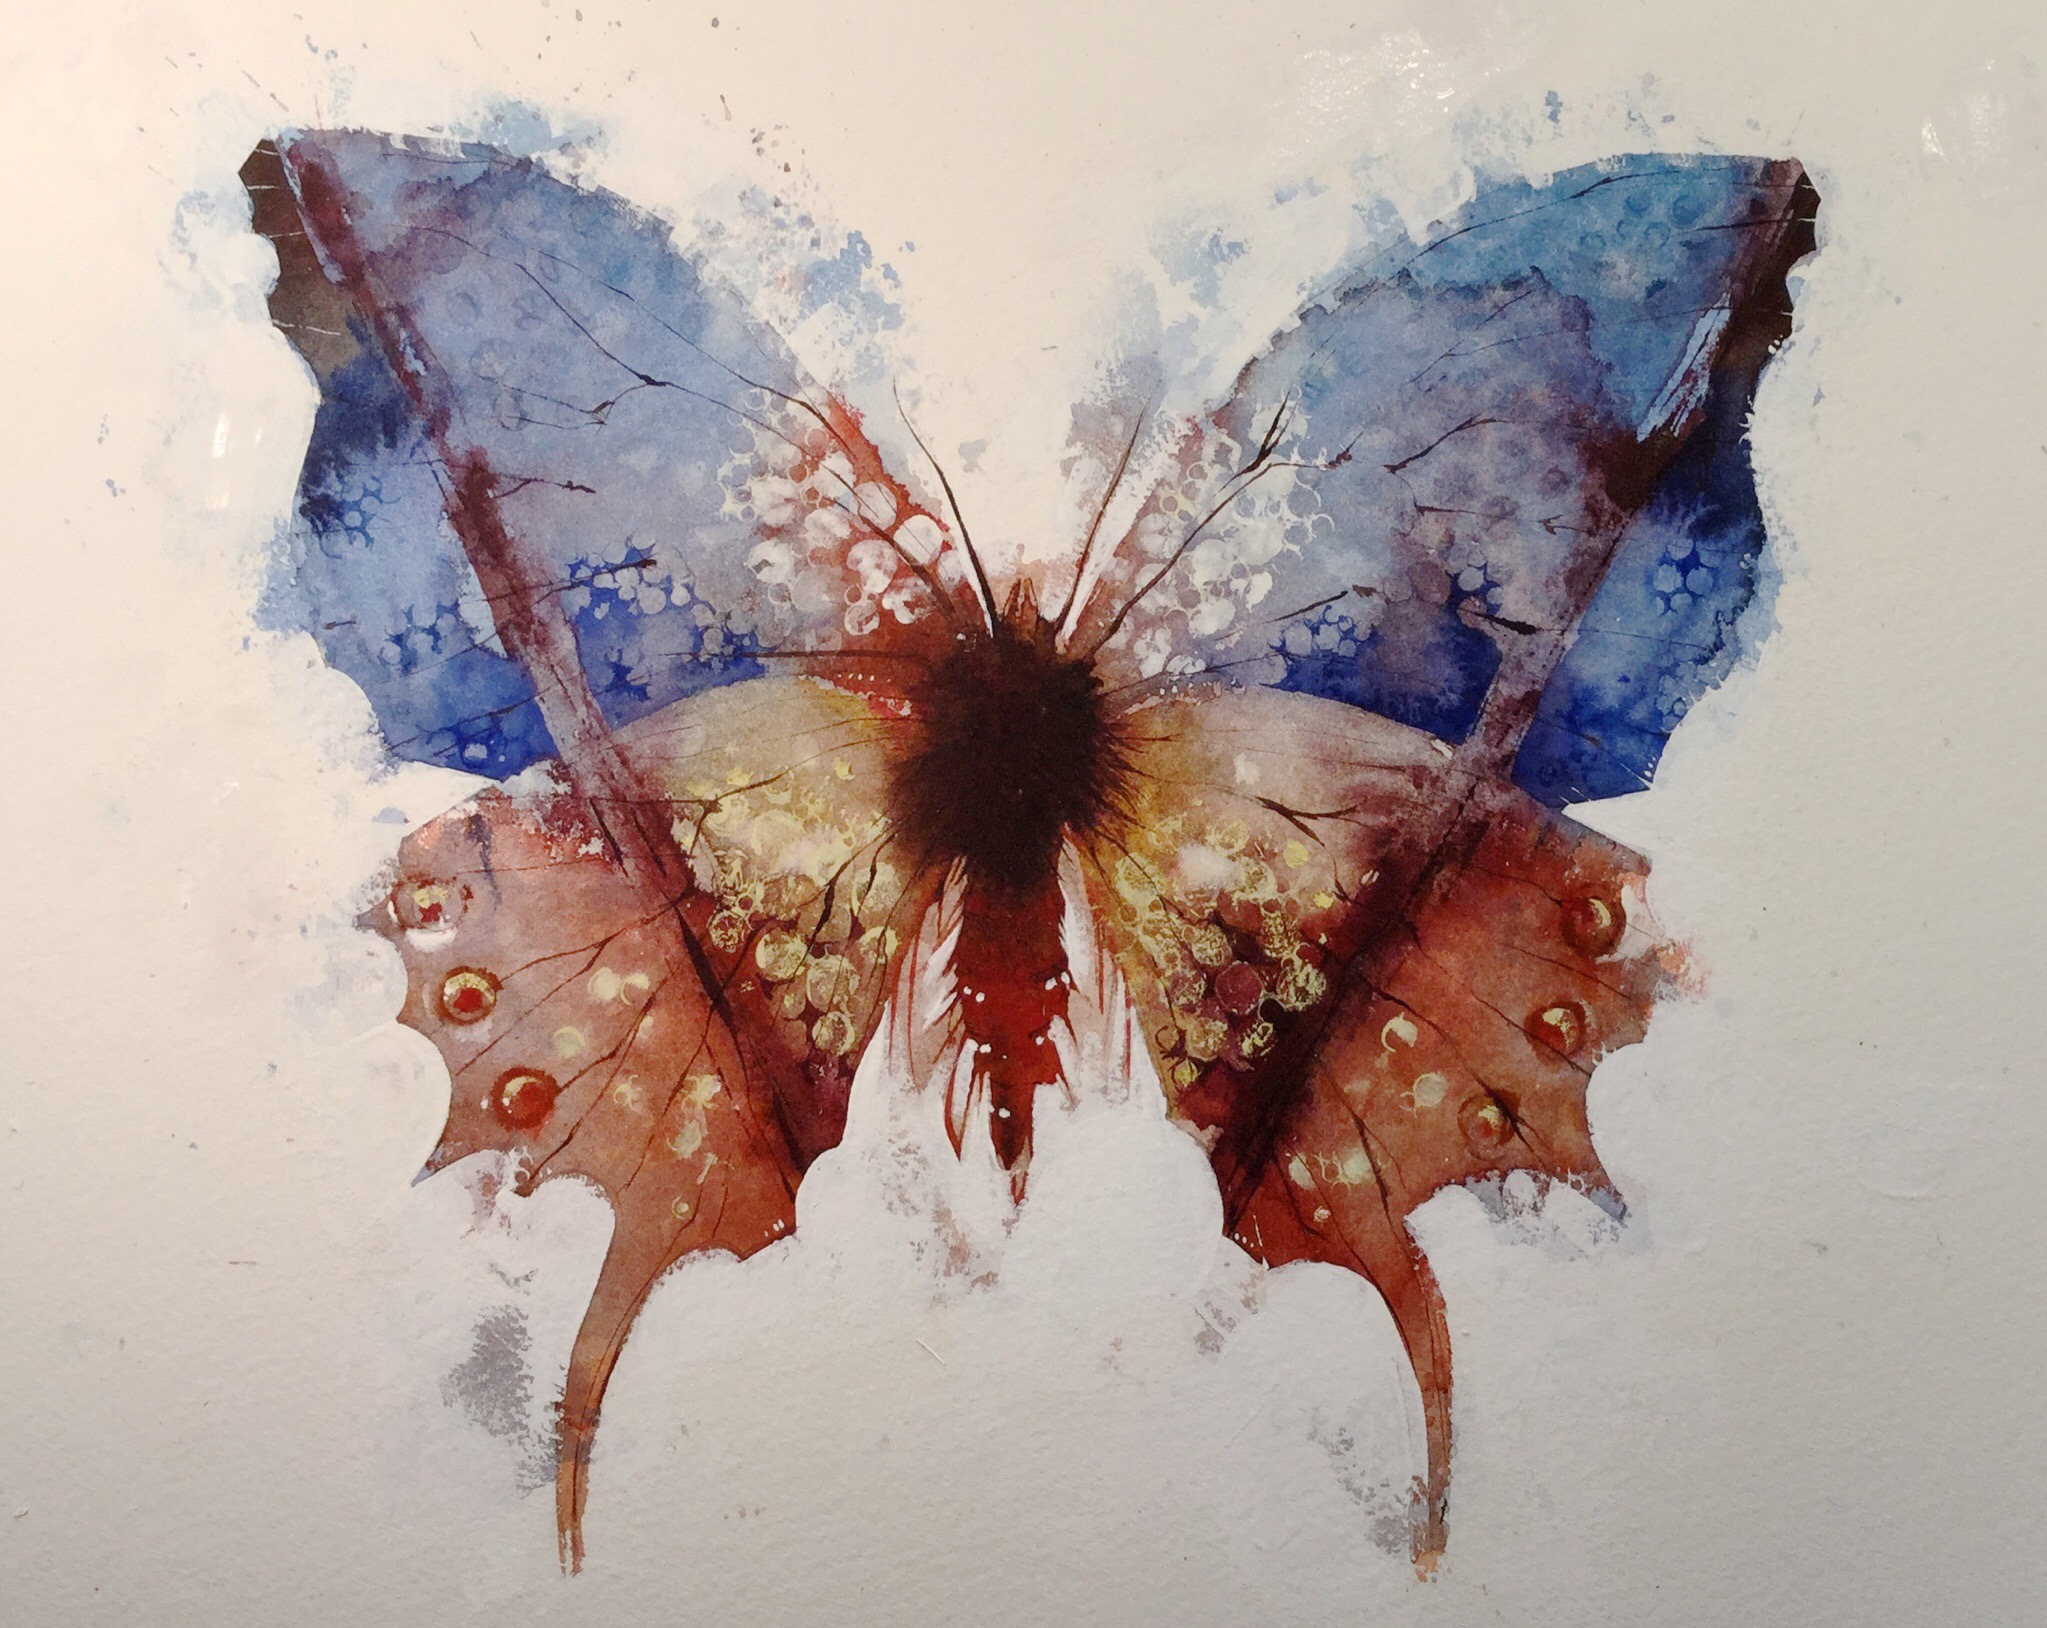
Finally I add the wing veins and the antennae with a sword brush and tidy up the outline with opaque gouache, matching it to the paper, in this case just slightly off white. I don’t get rid of all those broken textures as they remind me of the rather beautiful crumbling specimens in the museum!
Finished painting below

Wow, this is a stunner! Thanks for sharing your process as well! 💜
Thanks! And its a pleasure, working at home is an ivory tower, so good to communicate some of it!
This is amazing! What a stunning painting! I absolutely loved seeing all the details that went into creating this, it really is a very intricately layered process. Beautiful!
Thanks Laura,,very good to get feedback!
This is wonderful! Thank you so much for explaining how you made this image – I’m feeling really inspired to give something similar a try. 🙂
Thanks Rebecca, I’m delighted if it has inspired you!